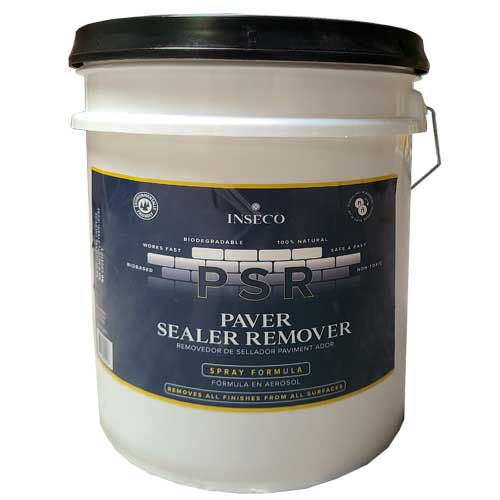

The following is a general overview of the proper steps involved when removing sealer from your concrete pavers using INSECO Paver Sealer Remover (PSR). PSR is an environmentally friendly, biodegradable, low odor sealer stripper designed to remove multiple layers of existing paver sealers. It works by penetrating and softening the existing sealer, aiding in easy removal. PSR will remove both solvent and water-based sealers, including: latex products, acrylics, alkyds, stains, lacquers, urethanes, epoxies, and more. It may be applied to virtually any substrate and will not damage the substrate, nor will it harm the environment or be detrimental to animals or humans.
The first step in preparation is to remove any loose debris from the area. Using a broom or blower, clear any loose leaves, stick, dirt, or other debris. If spraying area with a hose, it is important to let the area completely dry before applying the Paver Sealer Remover (PSR) as PSR is deactivated by water.
Ensure all areas not being stripped are fully protected. Along with paver sealer, PSR will strip paint and other coatings. PSR affects water-based and solvent-based coatings. While PSR is safe to spray on or near vegetation, care should be taken to apply PSR only to the area you want to strip.

Available in 1 or 5 gallon quantities
Using a pump sprayer, liberally apply Paver Sealer Remover (PSR), at 100% concentration, directly to the area requiring stripping of existing sealers or coatings.
APPROXIMATE COVERAGE: 75sqft–100sqft/gallon.
PSR Application Example
Allow the Paver Sealer Remover (PSR) to sit for a minimum 20–30 minutes.
Stripping action will be seen as a white haze or film that will develop over the area. This is the PSR penetrating and softening the existing sealer. If an area has limited or no existing sealer, the white haze may not be as apparent.
PRO TIP: In instances where there is a significant amount of existing sealer, or many layers existing sealer; applying a second coat of Paver Sealer Remover (PSR), after the initial application has set for 20–30 minutes, can provide better results during the Removal stage.
WARNING: Once the PSR has penetrated and softened the existing sealer, the area may be extremely slippery. Tread carefully and use proper footwear.
PSR Stripping Action
After the Paver Sealer Remover has done its job, and thoroughly penetrated and softened the existing sealer, it is time for removal using a pressure washer or scrub broom and detergent.
IMPORTANT: Start removal from the downhill side of the area (the side to which water drains), and work your way uphill (toward the direction from which water drains). The reason being that PSR is deactivated by water. You want to limit water runoff from affecting areas where the PSR has not yet been removed.
Using a pressure washer, thoroughly pressure wash the entire area. Be diligent about washing as PSR will only be fully removed by direct contact with pressure washer stream.
NOTE: A high-capacity pressure washer (4,000psi) is ideal as it will make quick work when removing PSR. A lower-capacity (2,000psi) unit will suffice, but take significantly longer.
PRO TIP: Using a rotary turbo nozzle will give you significantly better coverage and effectiveness when pressure washing. Also, a circular surface cleaner attachment will help with coverage if removing from a larger area, but is not absolutely necessary.
If a pressure washer is unavailable, PSR can also be removed by thoroughly scrubbing the entire area using a stiff-bristled scrub broom along with a degreasing detergent like Oxy Clean or Pine-Sol.
Fill a bucket with detergent and water, and use liberally while scrubbing.
NOTES: Using this method for removal has a higher tendency to leave missed spots. If you notice areas you may have missed, or where the existing sealer still remains, you can spot-treat using additional Paver Sealer Remover, starting at "Step 2" above.
This method will also take longer than the pressure washer method, and have a propensity for the area to dry out. The idea is that the detergent will allow the PSR and removed sealer to float above the pavers, preventing it from sticking or drying back to the paver surface during removal.
Pressure Washer Removal
Scrub Brush & Detergent Removal
After removing the Paver Sealer Remover and existing sealer in Step 4, thoroughly rinse the entire area using a pressure washer or garden hose.
NOTE: If you notice areas you may have missed, or if the existing sealer still remains, you can reapply additional Paver Sealer Remover, starting at "Step 2" above.
PRO TIP: Rinse tools and sprayers with soap and fresh water to easily clean.
Rinsing the Area