

The following is a general step-by-step guide for installing a retaining wall using SRW (Segmental Retaining Wall) blocks. It covers basic installation steps, and key considerations for building a retaining wall. Steps and components may vary depending on your specific project, site conditions, and wall design.
After selecting the wall location and placement, remove all surface vegetation and debris from the area. Excavate a base trench to the required depth, width, and length.
Dimensions will vary depending on the block style and wall design. As a general guideline, the trench should be:
NOTE: If the grade changes along the base of the wall, always begin excavation at the lowest elevation and work toward the highest.
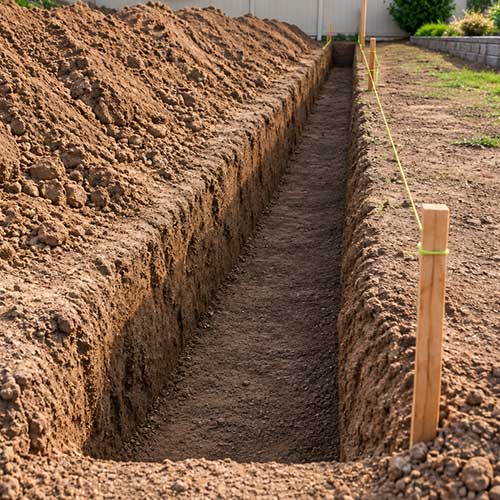
Excavate base trench to required dimensions
The leveling pad is the foundation of a stable, long-lasting retaining wall. It supports the weight of the wall and provides a level surface for the first course of block.
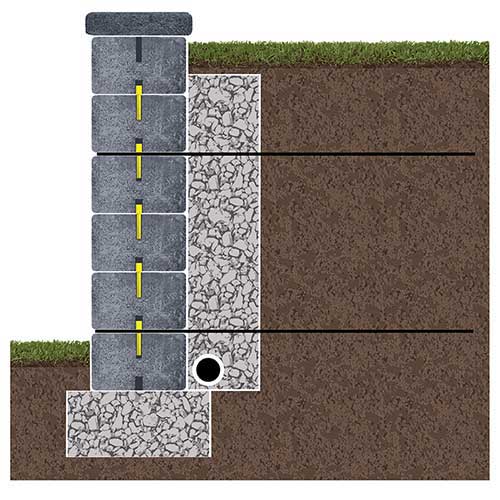
Fill the prepared trench from Step 1 with a minimum 6-inch-deep layer of clean 3/4-inch crushed gravel. Thoroughly compact and level the gravel to create the leveling pad.
NOTE: If the grade changes along the base of the wall, create a stepped leveling pad as needed and plan to step up the base course as shown. Always start the wall at the lowest elevation and work toward the highest.
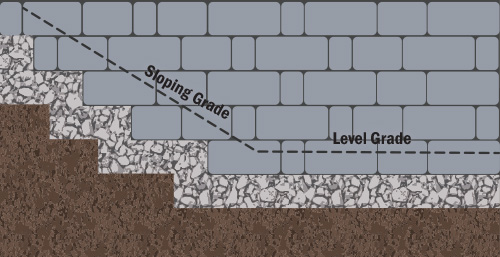
Step-up leveling pad and base course as needed
The first course of block is called the base course. It is critical that this course is level and properly aligned because any unevenness will carry through to the courses above it. Even a slight deviation can become more noticeable as the wall gets taller.
THINGS TO NOTE:
PRO TIP: For straight walls, use a string line to maintain alignment. Use the pin holes or back edge of the blocks as a guide.
Begin placing the block units on the prepared leveling pad. Use a torpedo level and a rubber or nylon dead-blow mallet to adjust each block. Level each unit from front to back and side to side. You may also need to adjust the gravel beneath the blocks to achieve a level surface.
Continue placing the blocks side by side along the wall. Make sure each block is level. As you work, use a 3- to 4-foot level to confirm that all blocks in the base course are at the same height.
Complete the entire base course before installing additional courses.
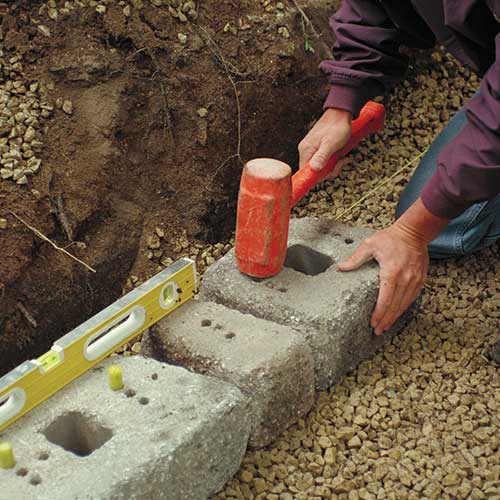
Use level and rubber mallet to install Base Course
Proper drainage is one of the most important factors in building a retaining wall. Water and hydrostatic pressure are leading causes of retaining wall failure, so it is critical to move water away from the back of the wall.
Place a 3-inch perforated drainage pipe behind the first course of block. The pipe will collect and direct water away from the wall to a suitable drainage location.
NOTE: Install the drainage pipe with the perforations/holes facing downward. A drain sleeve may also be used to help prevent fine particles from entering and clogging the pipe.
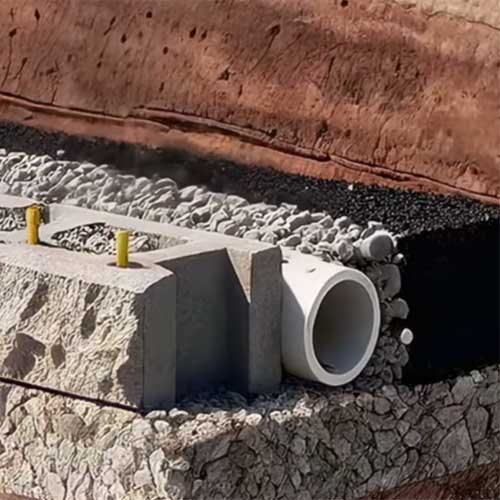
Place drainage pipe with holes facing downward
PRO TIP: If using a block style with a pin connection, insert the pins before backfilling each course. This helps prevent the pin holes from becoming plugged.
After each course of block is installed, place a minimum 12-inch-wide zone of clean 3/4-inch crushed gravel directly behind the blocks. Use the same gravel to fill open spaces and voids between blocks, as well as any open cavities or cores within the blocks. This gravel backfill zone is an important part of the wall's drainage system. It allows water to flow freely downward toward the drainage pipe.
When backfilling beyond the 12-inch-wide gravel zone, use only non-organic backfill materials such as crushed stone, clean gravel, or suitable sandy soils.
IMPORTANT: Never use heavily organic materials such as topsoil, mulch, compost, or yard waste to backfill a retaining wall. Organic materials decompose and shrink over time, which can create voids behind the wall. They can also absorb and retain water, increasing hydrostatic pressure and potentially causing the wall to move, crack, or collapse.
After backfilling each course, thoroughly compact the material using a vibrating plate compactor or hand tamper.
IMPORTANT: Do not use heavy ride-on compaction equipment within 3 feet of the back of the wall. Do not use jumping- or ramming-type compactors.
Backfill and compact each course before installing the next course.
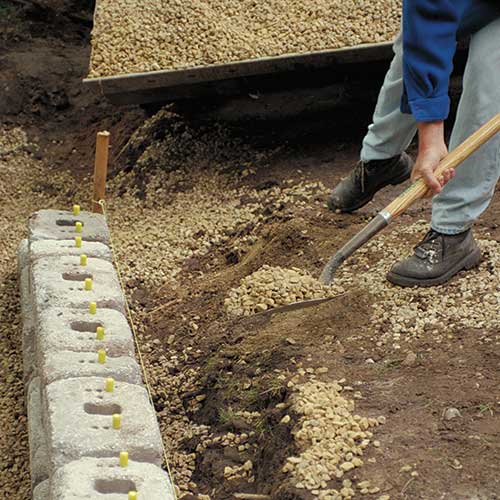
Fill all voids and cavities with 3/4" Crushed Gravel
NOTE: Geogrid is not required on all retaining walls. It is usually only required on walls over 3' in height when specified by the engineering plans. The plans will indicate the required placement and depth of the geogrid.
To install geogrid, place the geogrid on top of the completed wall course and extend it over the compacted backfill. Secure the geogrid by placing it over the pins in the completed course. Install the next course of wall units and backfill directly over the geogrid. Compact as normal.
IMPORTANT: Some types of geogrid are direction-specific and must be installed in a specific orientation, while others can be installed in multiple directions. Check the manufacturer's installation instructions for your geogrid to determine the correct orientation before installing.
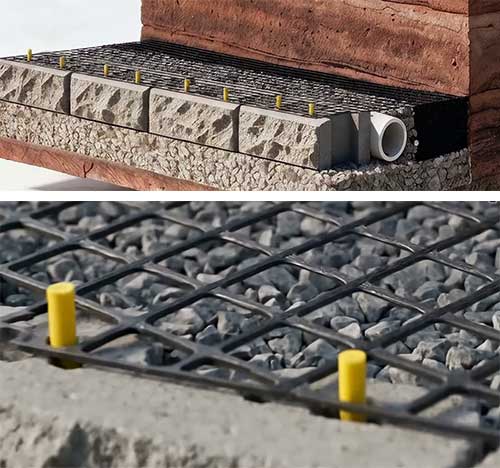
Geogrid specified by engineering plans
Continue adding courses, backfilling, compacting, and adding geogrid as required until the wall reaches the desired height.
CONSIDERATIONS WHEN ADDING COURSES:
NOTE: If wall design contains curves, the bond pattern may shift sideways at the curve. If a stack bond occurs, meaning the joints begin to line up with those in the course above or below, there are several ways to correct it:
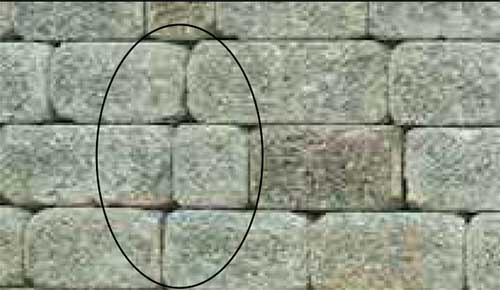
Avoid stack bond when adding courses
Before installing the finishing wall caps, clean the top course of block by brushing it with a broom or rinsing it with water. Allow the blocks to dry completely.
Before applying adhesive, position all the wall caps along the top course. This allows you to adjust and confirm the final layout.
Once the placement is set, apply a bead of masonry adhesive to the top course and install the caps one at a time. Wall caps may be installed flush with the wall or with an overhang, depending on the desired appearance and design.

Wall caps give a finishing touch to the wall
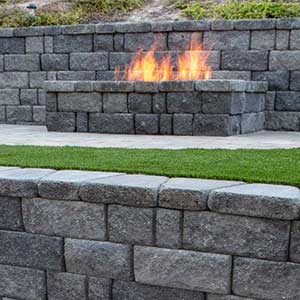
Retaining Walls for Any Project
Understanding the Parts of a Wall
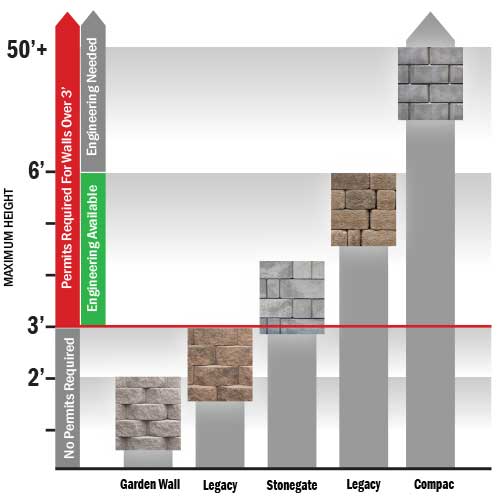
Choosing the Right Block
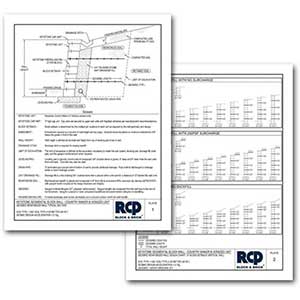
Select Retaining Walls up to 6-feet